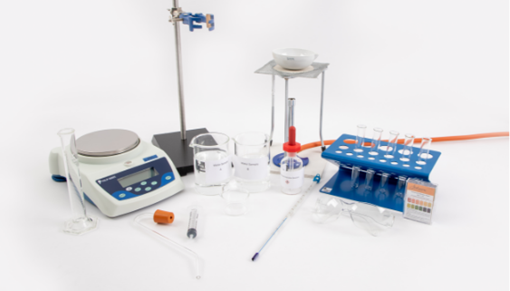
Water Purification GCSE Chemistry Practical
Analysing and purifying a sample of water and making it ‘safe to drink’.
During this required practical, students are required to test, analyse, and purify a water sample using a simple distillation. The students will measure the pH of the water, comparing it with the pH of pure water and will reveal and remove any dissolved solids by evaporation. They will then distill the water and re-test it to show it is now purified. Their use of laboratory equipment is also assessed.
| Subject: Chemistry | Level: GCSE |
You will need:
Method
Activity 1: Analysing a Water Sample
- Collect Equipment
- Gather all necessary equipment, including a Bunsen burner, evaporating basin, electronic balance, universal indicator paper, and water samples.
- Test the pH of the Water Samples
- Use a piece of universal indicator paper to test the pH of each water sample.
- Record the pH values in a suitable table.
- Weigh the Evaporating Basin
- Use the electronic balance to weigh an empty evaporating basin.
- Record the mass to two decimal places.
- Add Water to the Basin
- Pour 10ml of the first water sample into the evaporating basin.
- Record the combined mass of the evaporating basin and the water.
- Heat the Water Sample
- Place the evaporating basin over the Bunsen burner.
- Heat gently until dissolved solids begin to appear as the water evaporates.
- Cool and Weigh the Solids
- Once most of the water has evaporated, turn off the Bunsen burner and allow the basin to cool.
- Re-weigh the evaporating basin with the remaining solids and record the mass.
- Repeat for All Water Samples
- Repeat Steps 3–6 for each water sample, recording results in the table.
Activity 2: Purifying Water by Distillation
- Set Up the Distillation Equipment
- Assemble the distillation apparatus:
- Place a conical flask on a tripod and gauze over a Bunsen burner.
- Add 10ml of the first water sample to the conical flask.
- Insert a bung with a delivery tube into the flask, ensuring the other end of the tube extends 3cm above the bottom of a test tube.
- Place the test tube in a beaker of iced water and secure it with a retort stand and clamp.
- Heat the Water Sample
- Gently heat the conical flask until the water starts to boil.
- Lower the heat to maintain a gentle boil.
- Observe the Distillation Process
- Watch as steam rises in the conical flask, condenses on the inside of the delivery tube, and collects as purified water in the test tube.
- Continue distillation until approximately 1cm of water is collected in the test tube.
- Turn Off the Equipment
- Switch off the Bunsen burner once the desired amount of purified water has been collected.
- Analyse the Distilled Water
- Determine the boiling point of the distilled water to confirm its purity.

Technician tips
• The pH of a water sample could be increased using Hydrochloric Acid.
• Dissolved solids could include Sodium Chloride and Sodium Carbonate.
• To prevent suck-back during the distillation, students should be warned to not let the solution from the conical flask boil into the delivery tube. The end of the delivery tube should be kept at least 3cm away from the bottom of the test tube.
Products you may need
Investigate the effect of light or gravity on the growth of newly germinated seedlings. The experiment involves students calculating the height value on a graph of seedling to generate different light conditions. To do this practical students will need brassica rapa seeds, petri dishes, rulers, cotton wools, cress seeds, fine point forceps and disposable pipettes. At Philip Harris, we provide essential biology equipment you need to carry out experiments safely and efficiently in your school or science lab. Shop our biology equipment today.


